DOG MANICURE
These are my sweet little angels.....
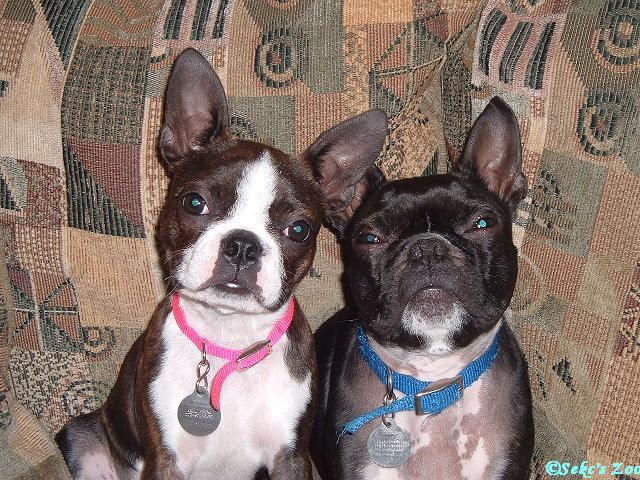
And they are quite popular on dog message boards for getting intricate manicures. A lot of people have inquired about how they can give their own dog a manicure. I'm going to break it down.
1. You need a cooperative dog. If your dog cannot sit/down stay for at least 30 minutes, don't even bother. It will stress you out and it will stress the dog out. The best way to acclimate a dog to a manicure is to touch/handle its' paws at an early age. Handle them as often as possible so they'll be used to it. It's important that they are used to having their paws touched not for manicure sake but for when they need to get their nails clipped. If your dog gets used to having its' paws touched, start practicing stay. I would practice that and reward it heavily. If you can get a dog to stay still for at least 30 minutes, that's a good sign. You might also want to introduce it to the noise of a dremel and/or a blow dryer. Reward heavily when you introduce those. When a dog doesn't seemed bothered by those noises and is capable of staying for at least 30 minutes, then you can attempt a manicure.
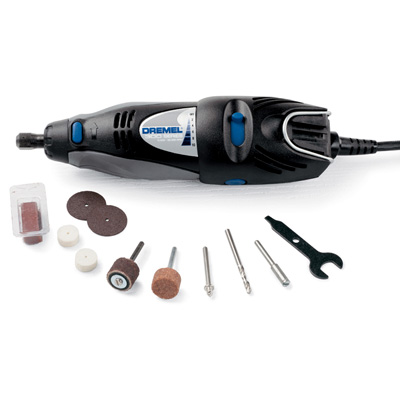
2. You'll need some manicure supplies. You'll need a dremel. A dremel is actually the brand name for an electric file. I like to use an electric file to file down and buff the nails. It helps smooth out sharp edges. This is the one I use. It's a Dremel 300 Series.
You can use a blow dryer as well. I prefer to use one as it helps shorten drying time. I'm sure you all know what that looks like so I won't post a picture of that. Now onto the most important thing. You'll need nail polish. I prefer hot flashy colors like this...
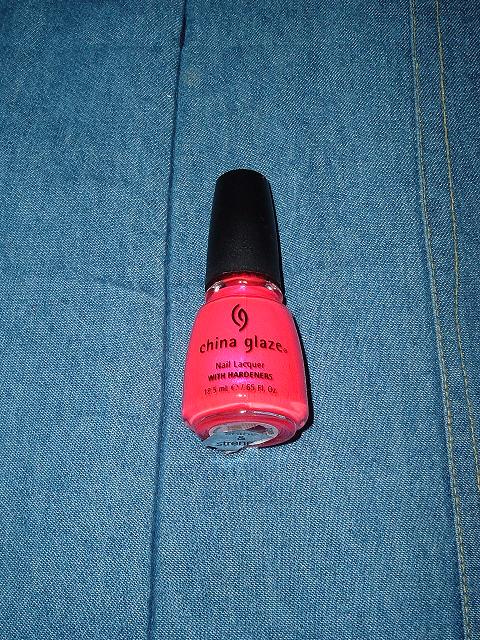
I use human nail polish. There is more of a variety with human nail polish as opposed to dog nail polish. There are dog nail polishes out there. I know OPI had a line called Pawlish but I believe it's been discontinued. I know you can buy dog nail polish in pet catalogs and such. Now some people question the use of human polish on dogs. I can only say that my dogs do not chew or lick excessively at their paws or nails. If your dog is constantly licking and/or chewing its' paws or nails you might want to rethink giving it a manicure. If you choose to do so anyways, you do it at your own risk as I don't know what health risks, if any, are associated with painting your dogs nails with human nail polish.
3. Get comfortable. You might be a while so you want to be comfortable. You also want your dog comfortable. If your dog is very submissive, small and very strange like Souffle, you can actually lay him/her on his/her back on your lap. I do this with Souffle. He naps while I do his nails. If your dog is wiggly, small/medium/large and is a total fruit loop like Shelby, you might want to put him/her on a chair, table or on the ground in a down stay. We practice Shelby's obedience this way and she naps while she gets her manicure.
4. You'll need some Styptic powder/liquid/stick. Styptic is something that is used for stop bleeding. I highly recommend you have Styptic on hand when cutting a dogs nails ESPECIALLY if the dog has black nails. Accidents happen and the last thing you want is blood everywhere. If you nick the dog, apply the Styptic and apply pressure. The bleeding should stop immediately and if it doesn't, keep applying Styptic and apply pressure until it does. I also keep triple antibiotic ointment with pain relief on hand as well to apply to the tip of the nail to keep the risk of infection at bay.
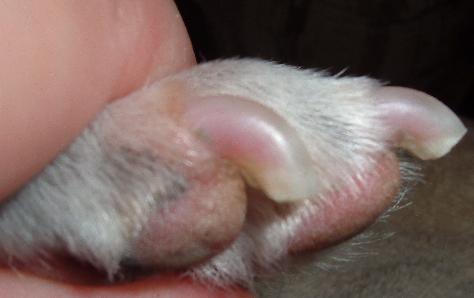
5. I use a Dremel to file the nails down. You can also use "guillotine" style nail clippers as well. If your dog has light colored nails, you want to cut right before the "quick". The quick is the pinkish part on the nail...
3. Get comfortable. You might be a while so you want to be comfortable. You also want your dog comfortable. If your dog is very submissive, small and very strange like Souffle, you can actually lay him/her on his/her back on your lap. I do this with Souffle. He naps while I do his nails. If your dog is wiggly, small/medium/large and is a total fruit loop like Shelby, you might want to put him/her on a chair, table or on the ground in a down stay. We practice Shelby's obedience this way and she naps while she gets her manicure.
4. You'll need some Styptic powder/liquid/stick. Styptic is something that is used for stop bleeding. I highly recommend you have Styptic on hand when cutting a dogs nails ESPECIALLY if the dog has black nails. Accidents happen and the last thing you want is blood everywhere. If you nick the dog, apply the Styptic and apply pressure. The bleeding should stop immediately and if it doesn't, keep applying Styptic and apply pressure until it does. I also keep triple antibiotic ointment with pain relief on hand as well to apply to the tip of the nail to keep the risk of infection at bay.
5. I use a Dremel to file the nails down. You can also use "guillotine" style nail clippers as well. If your dog has light colored nails, you want to cut right before the "quick". The quick is the pinkish part on the nail...
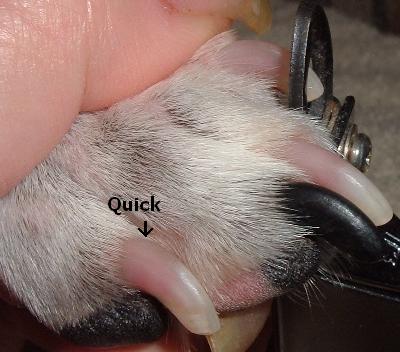
You want to cut right before the quick. If your dog has black nails, you want to proceed with caution. Try to clip the same length as you did with the clear nails. Keep your Styptic nearby in case you nick the quick. You can actually feel the quick as it feels kind of leathery. I have found that dogs do not react as badly to a quick cut by Dremel than one by nail clipper which is why I prefer using a Dremel as opposed to nail clippers.
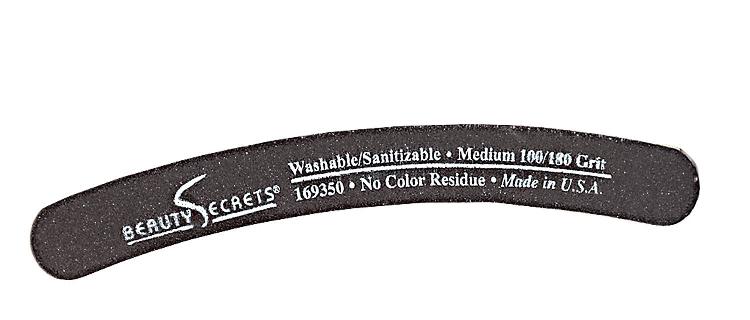
Another option is to use a nail file meant for human nails. Occasionally, I'll use a curved file with a 100/180 grit after using nail clippers or a Dremel to file down the nail even more if I'm afraid that I'll nick the quick with the other tools.
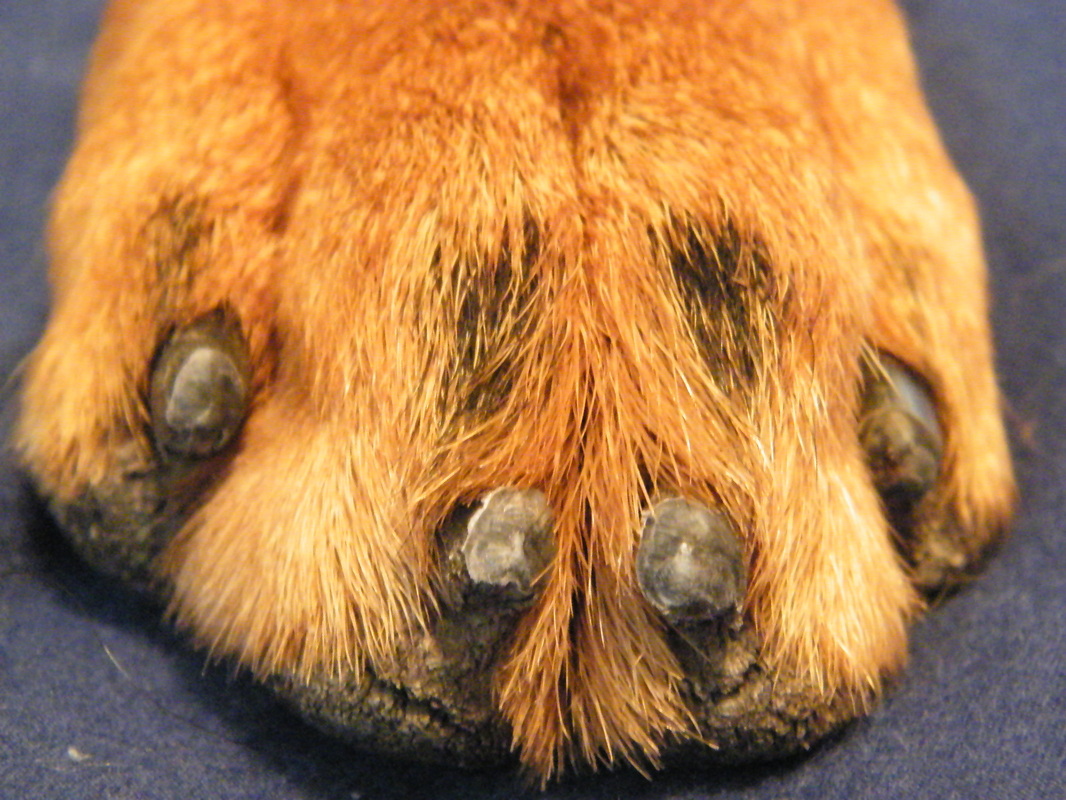
When it comes to black nails, you have to be a bit more careful because you cannot see the quick. This is my Rottweiler Wrigley's nails before being filed. This is the side view...
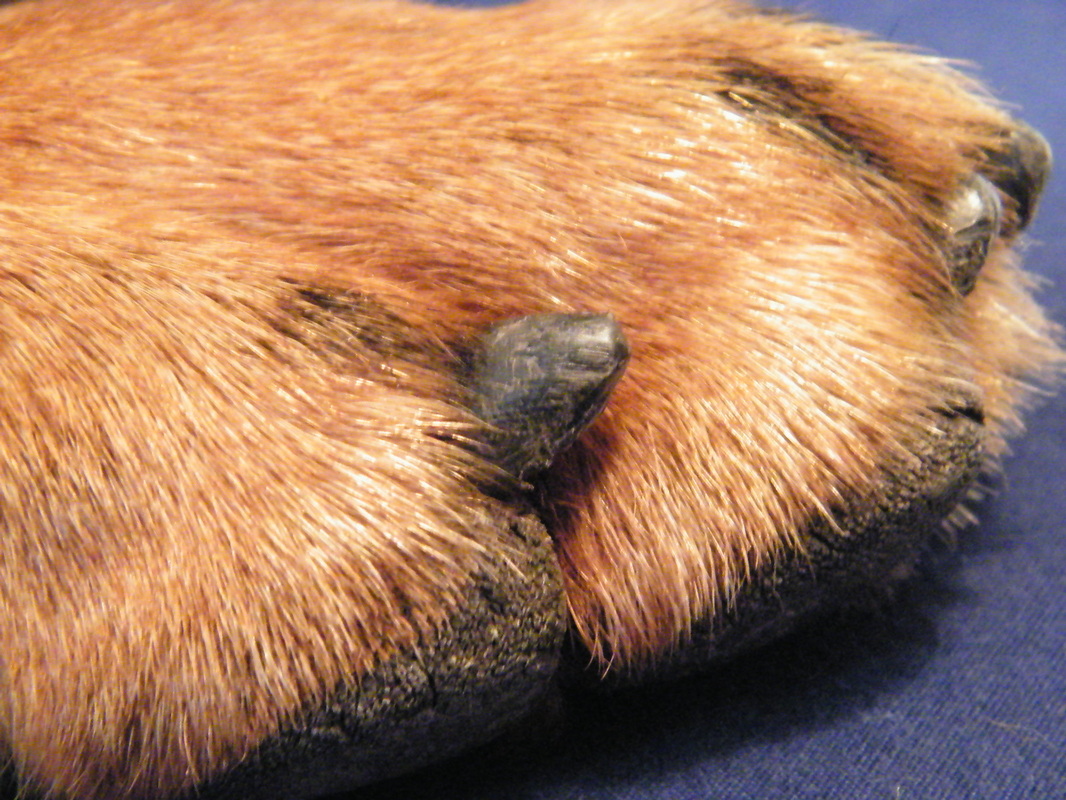
This is the front view. As you can see in the picture, you cannot see the quick...
I prefer to use a Dremel on black nails because if you happen to nick the quick, it doesn't seem to bother the dog as much as opposed to clippers. If you choose to use clippers, it's best to clip a very little at a time until you feel or see the quick. The same thing goes with the Dremel. The quick on black nails looks grey with white in the middle and it feels rubbery....
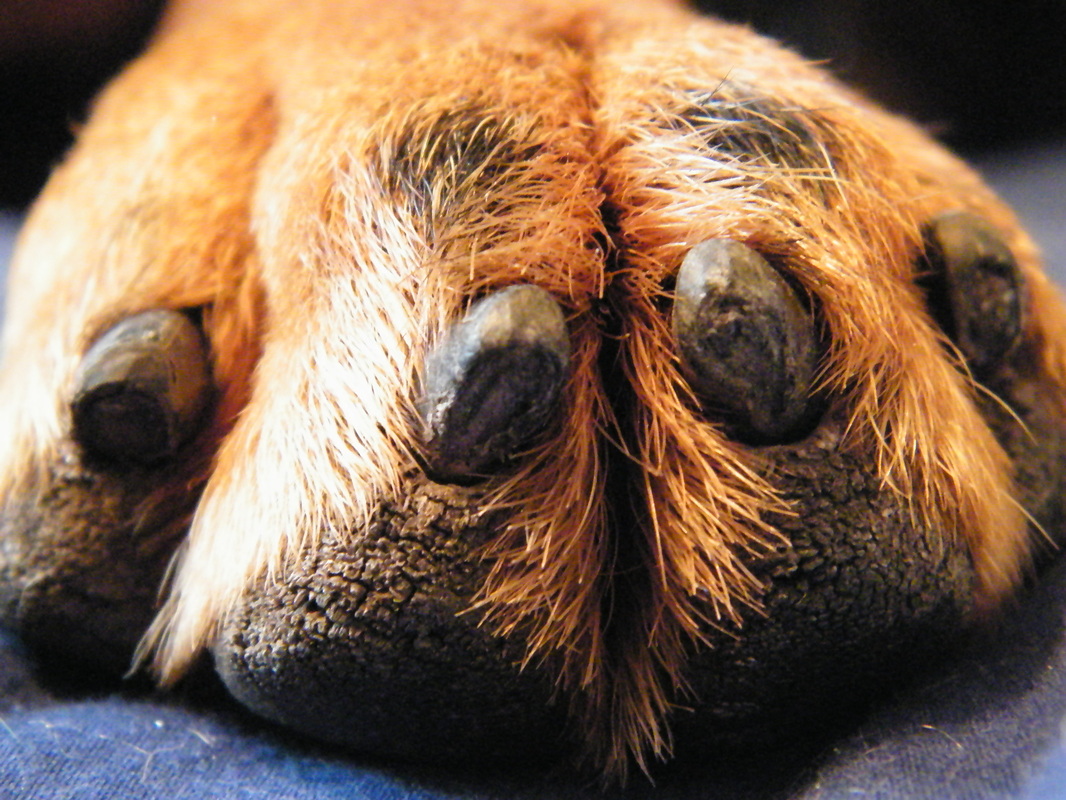
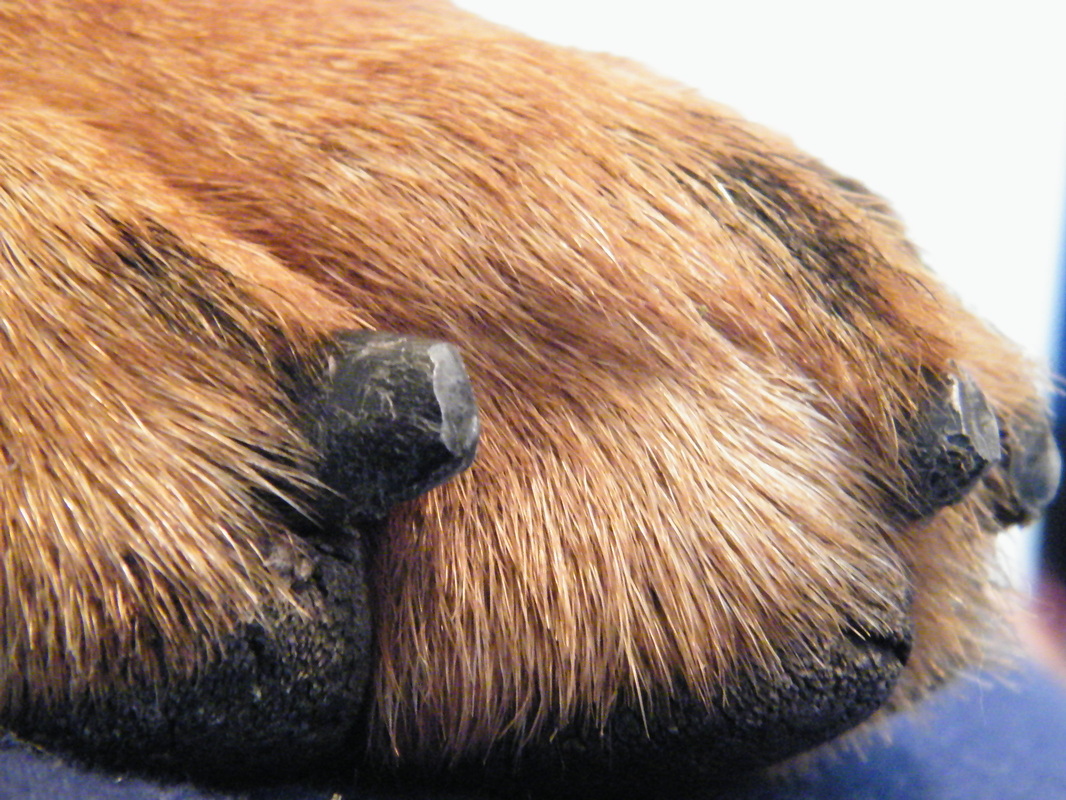
When it comes to maintaining dog nails, I try to do them every week and I most definitely will not go longer than 2 weeks because my dogs nails grow that fast. This is the side view of Wrigley's nails after being filed...
It's best to keep up with dogs nails as much as possible because the longer you go between trims, the longer the quick will grow. You can get it to recede by trimming nails every other day, which is a huge pain, but if the quick gets crazy long, and as a last resort, the vet may have to put the dog under anesthesia, clip the nails short, cauterize the quick and then you'll have to be sure to trim them as much as possible to prevent the quick from getting long again.
Once you're comfortable and your dog is cooperating, get your polish ready. If your dog has a lot of fur covering the nails, you might want to pull the fur back or even trim it. I polish one nail at a time. I use a thin coat because if you put a heavy coat, it takes longer to dry. After I paint that nail, I'll blow dry it on a cool setting for a minute and move onto the next nail. When I'm done painting all of the nails, I'll blow dry all of them alternating with a cool and warm setting for about five minutes. Make sure the blow dryer isn't too close to the dogs paws and make sure you keep it moving back and forth to prevent burning your dog.
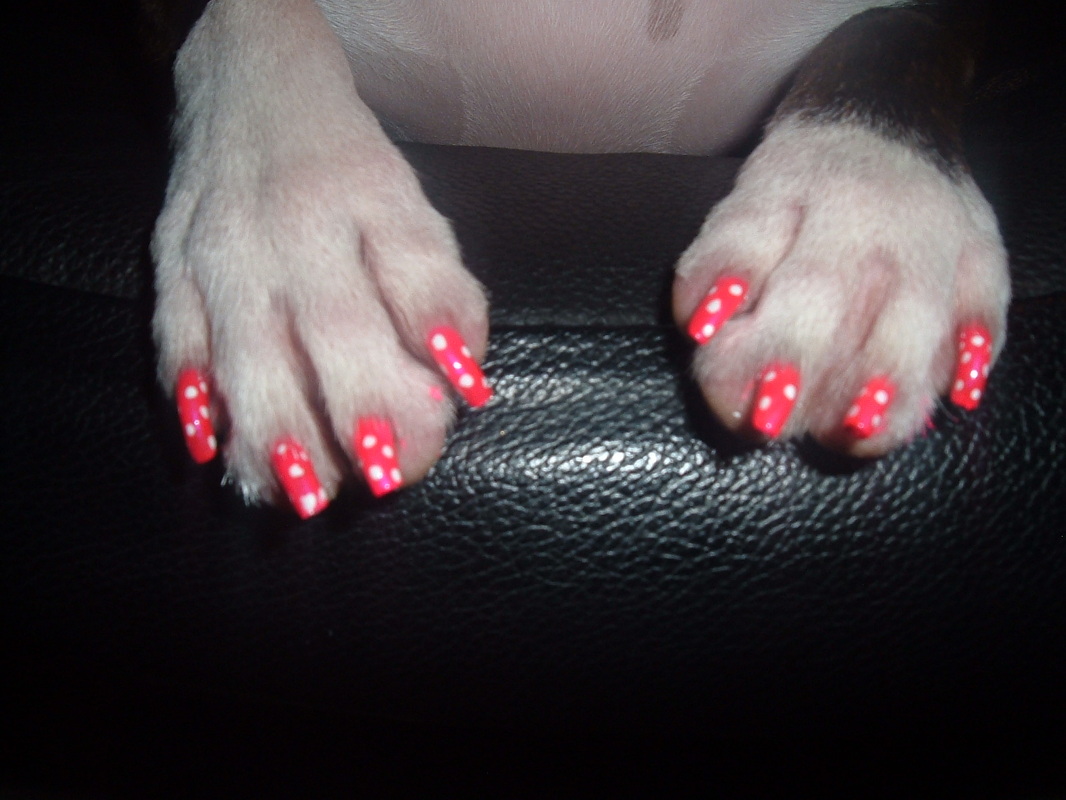
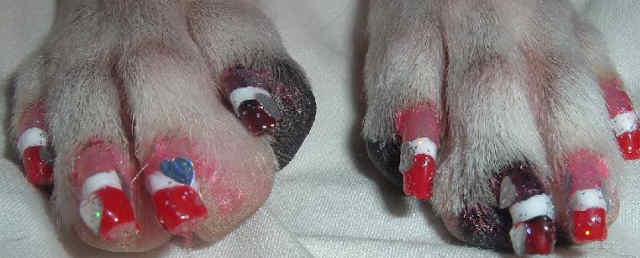
6. When the nails seem dry, I apply a quick dry clear top coat on the nails and on the end of the nail. This makes the polish even shinier and it helps the manicure last a bit longer. After I apply that I blow dry the nails again for about 5 or 10 minutes until the nails feel dry. When you're done, hopefully the dog cooperated by staying still for the whole process and your dog will have pretty nails like this...
Once you're comfortable and your dog is cooperating, get your polish ready. If your dog has a lot of fur covering the nails, you might want to pull the fur back or even trim it. I polish one nail at a time. I use a thin coat because if you put a heavy coat, it takes longer to dry. After I paint that nail, I'll blow dry it on a cool setting for a minute and move onto the next nail. When I'm done painting all of the nails, I'll blow dry all of them alternating with a cool and warm setting for about five minutes. Make sure the blow dryer isn't too close to the dogs paws and make sure you keep it moving back and forth to prevent burning your dog.
6. When the nails seem dry, I apply a quick dry clear top coat on the nails and on the end of the nail. This makes the polish even shinier and it helps the manicure last a bit longer. After I apply that I blow dry the nails again for about 5 or 10 minutes until the nails feel dry. When you're done, hopefully the dog cooperated by staying still for the whole process and your dog will have pretty nails like this...
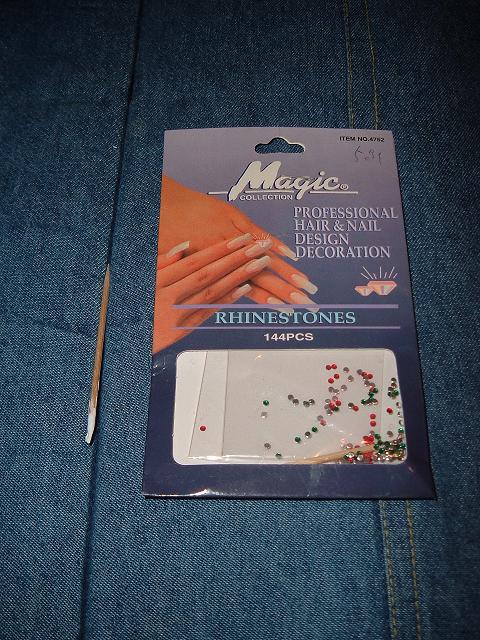
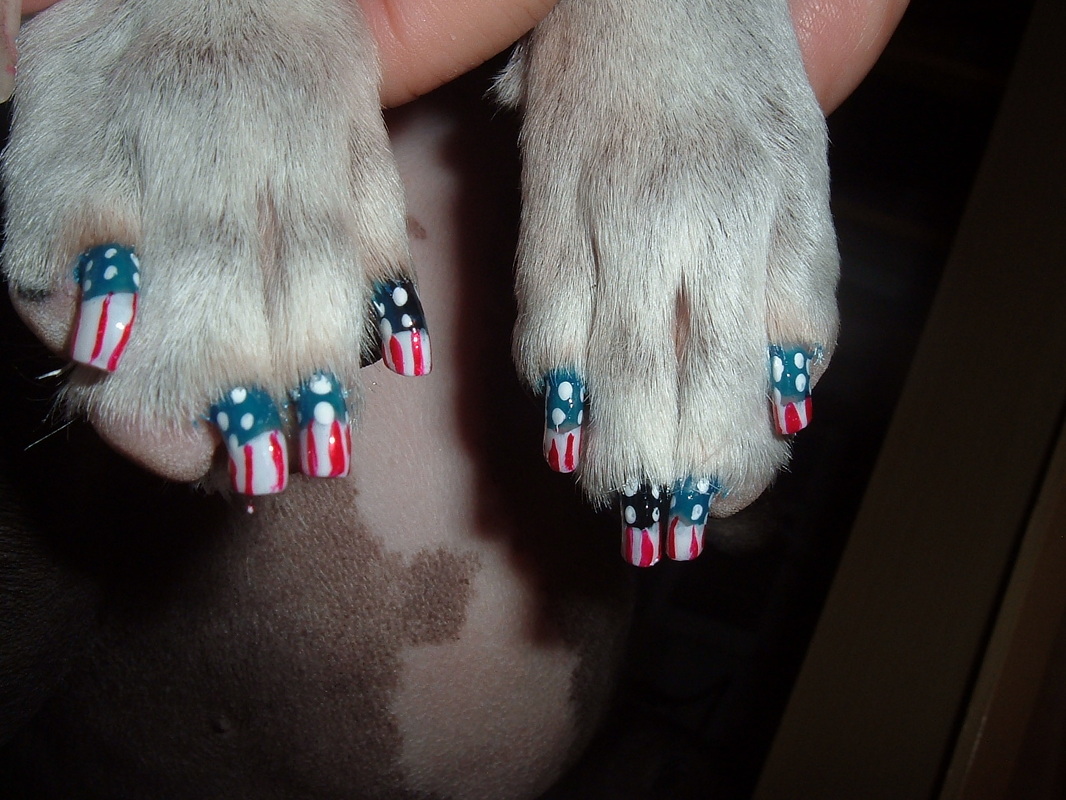
7. Now if you really want to get dramatic and your dog has been cooperating with getting a manicure, you can really jazz things up. If you want to go bucked wild, you'll need some rhinestones...
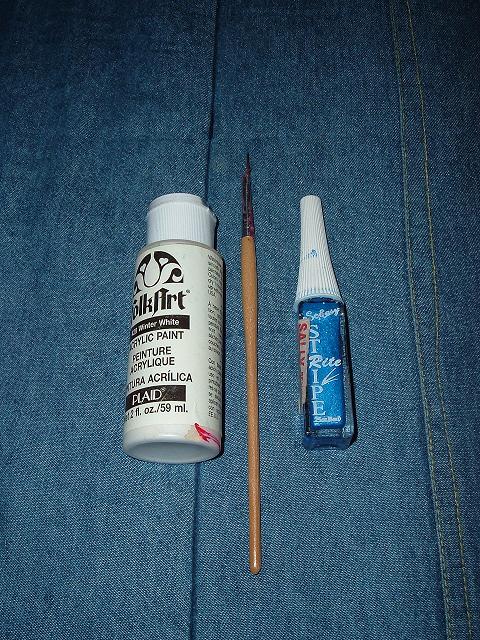
You'll need some acrylic paint and a striping brush....
With these things, you can add stripes and rhinestones to a manicure...
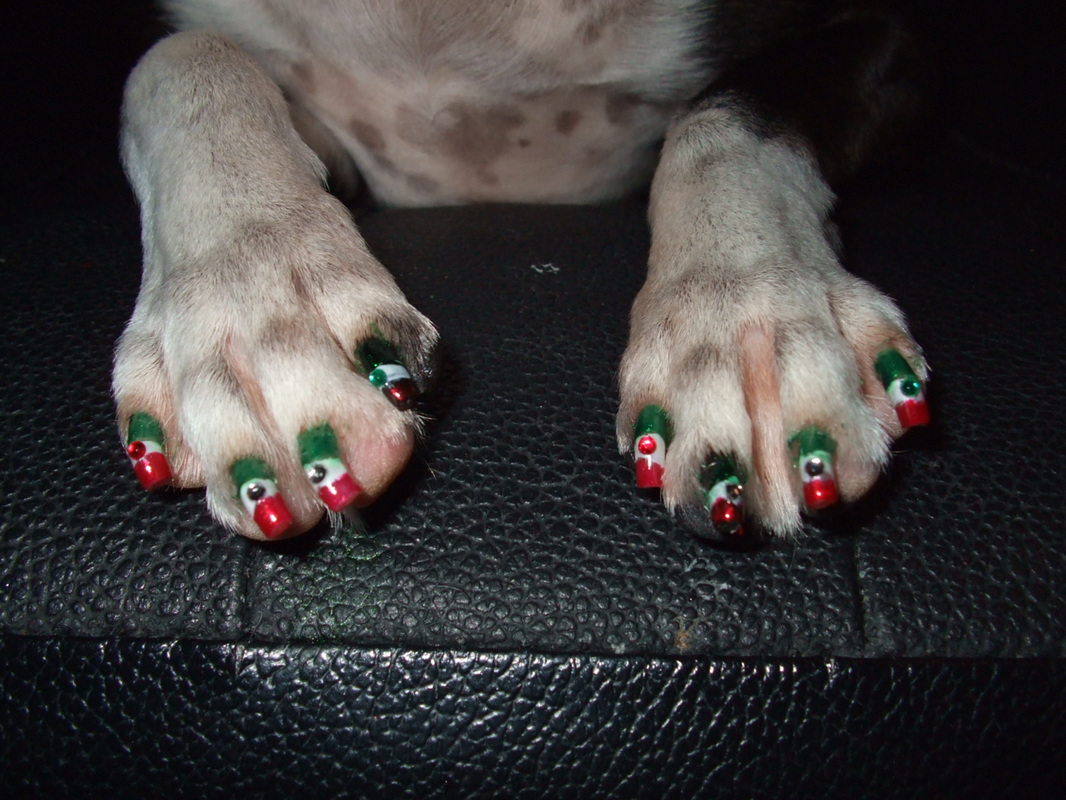
You can use a toothpick and acrylic paints to add polka dots...
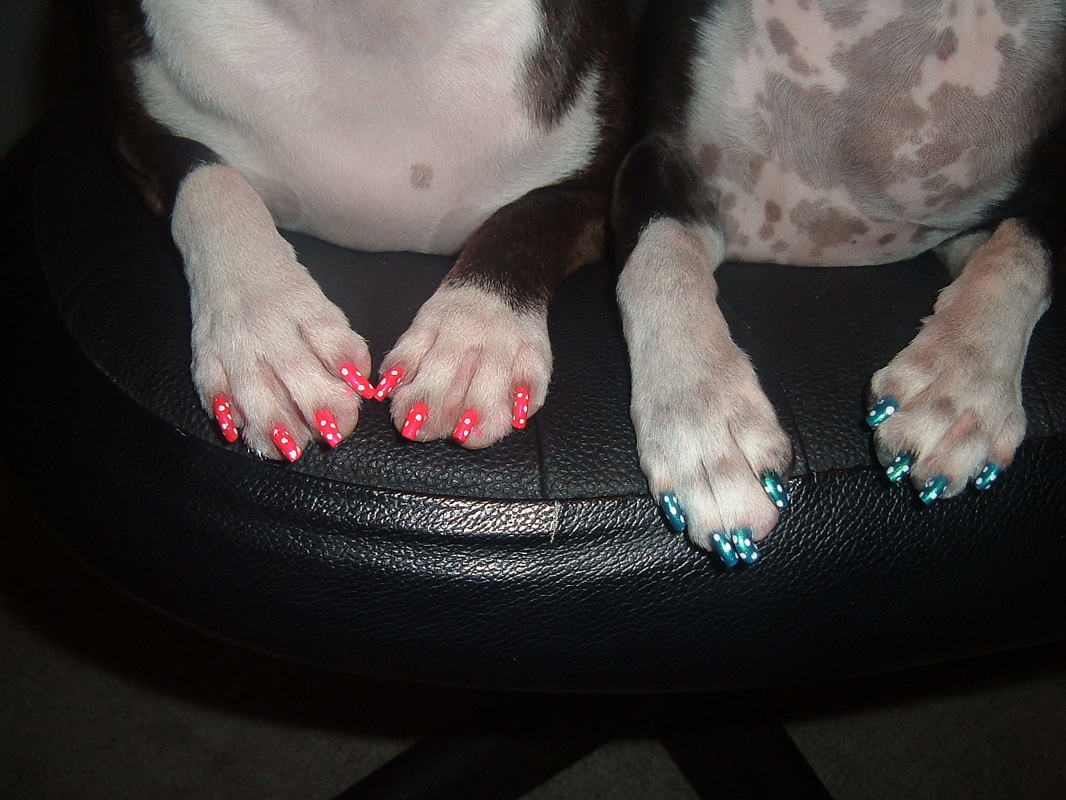
You can use acrylic paints, a toothpick and a striping brush to add dots and stripes...
You can even use little manicure stickers such as hearts....
And that's the end. I hope this has helped and have fun! You can also check out a video of Shelby getting a manicure....
